Project Level: n00b - if you have a sewing machine you can do this.
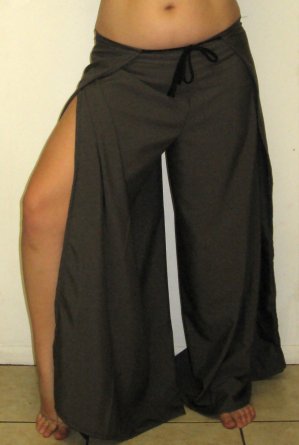
All my friends call these "comfy pants" because they are so comfortable. They are really easy to make (it takes about twenty minutes if you are using fabric that needs to be hemmed). You can use almost any kind of fabric you like, I prefer cotton but I've made them out of denim, synthetic-blends, strechy fabric, all kinds of fabrics.
Here are the basic instructions:
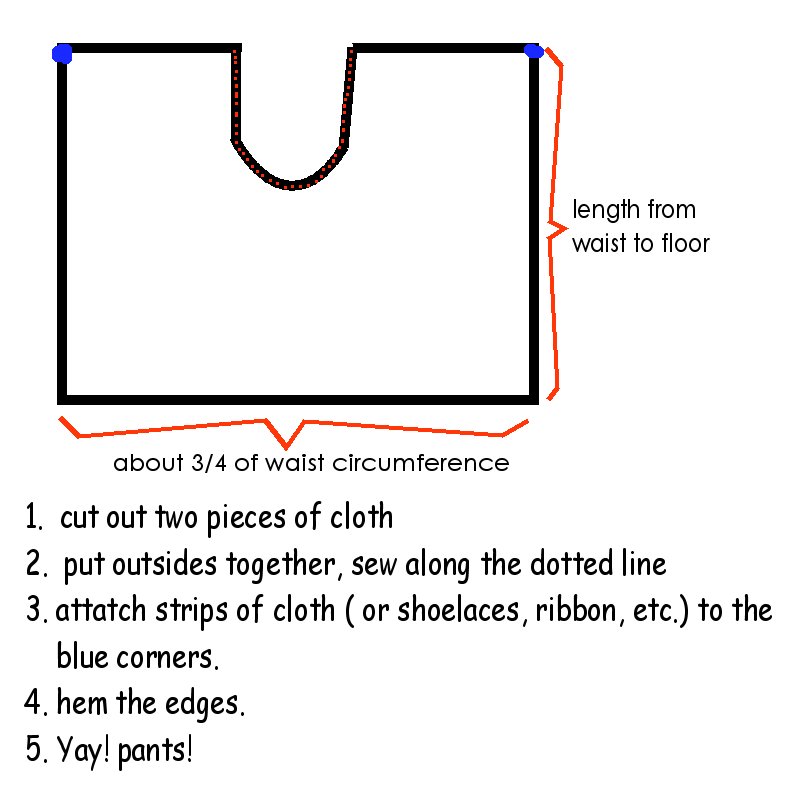
The hole that you cut out is for the crotch of the pants and should be about as big as your head. If you get it wrong and its too small, you can always cut more out and resew that seem. All the measurements are very forgiving.
Here's how to put this pair of pants on:
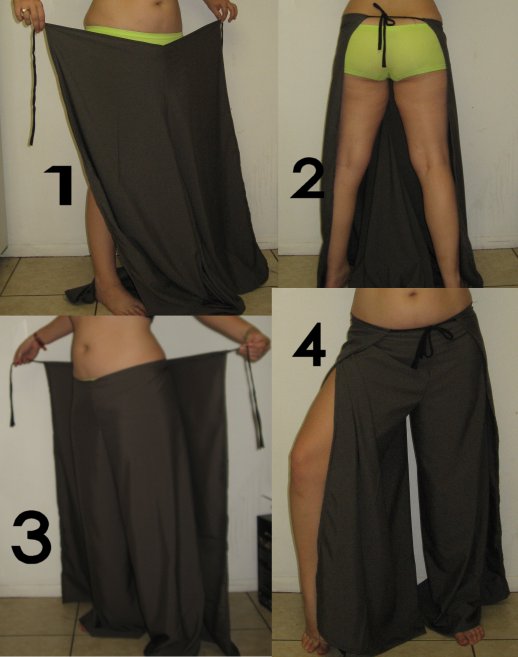
1. Grab an edge that has two of the ties, the seam should be in the middle
2. Wrap that edge around your waist and tie in the back.
3. Pull the rest of the fabric between your legs and up behind you. Grab the other edge with ties.
4. Wrap that side around and tie in front. yay!
If you didn't follow that maybe these instructions will help:

Enjoy your wrap pants!
 For supplies you will need some sculpey (or other polymer clay). I use white sculpey and then paint it when I'm done, but you could use colored sculpey if you wanted. You will also need earring findings, and some superglue.