Inspired by my cupcake tutorial, I decided to post some other tutorials for making cute charms out of polymer clays like Sculpey and Fimo. Enjoy!
I dont know what kind of clay this girl uses, but you normally have to bake polymer clay.
Saturday, November 15, 2008
Friday, October 24, 2008
Video Tutorial: Seven Flowers Pop-Up Card
I thought this was so cute when I saw it, I had to share it!
Seven Flowers. Awesome Pop Up. - Watch more amazing videos here
Seven Flowers. Awesome Pop Up. - Watch more amazing videos here
Tuesday, August 5, 2008
Low-Tech Screen Printing Tutorial (cheap!)
This is by far one of my all time favorite craft tutorials. I found it a couple years on the lovely LJ community CraftGrrl. Its an easy and cheap way to screen print shirts.
Here's what you need:

1) Embroidery hoop. For more stability you can use a canvas frame and a staple gun.
2) Sheer fabric. Tulle and Nylon don't work very well but you want something that you're going to be able to see through and paint will soak through.
3) Mod Podge
4) Fabric paint (whatever color you want)
5) Paint brushes
6) Scissors
7) Pencil
You'll also need a shirt or something to print on, and a pattern, drawing or design to print.
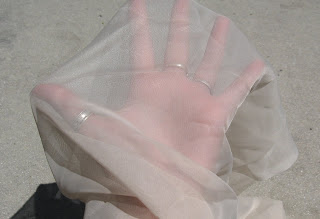
The fabric should be sheer like this.
First you want to attach your fabric to your embroidery hoop or frame - make sure it is firmly secured and stretched out tight. Next you are going to trace your design onto the fabric.
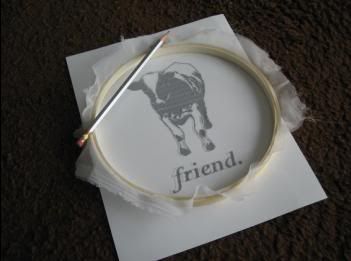
Thanks to Girlx512 for the image. (and the next few)
After you've traced your design you are going to paint in all the NEGATIVE space with Mod Podge. This means you want to cover any area of your design that you don't want to be colored in when you print it.

Once the Mod Podge is is dry you put it down on top of whatever you want to screen print and gently dab the fabric paint (or screen-printing ink if you have it) through the screen.
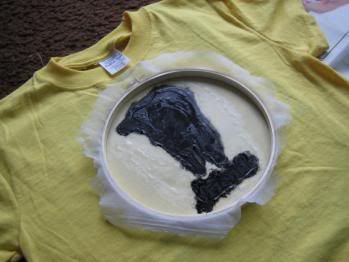
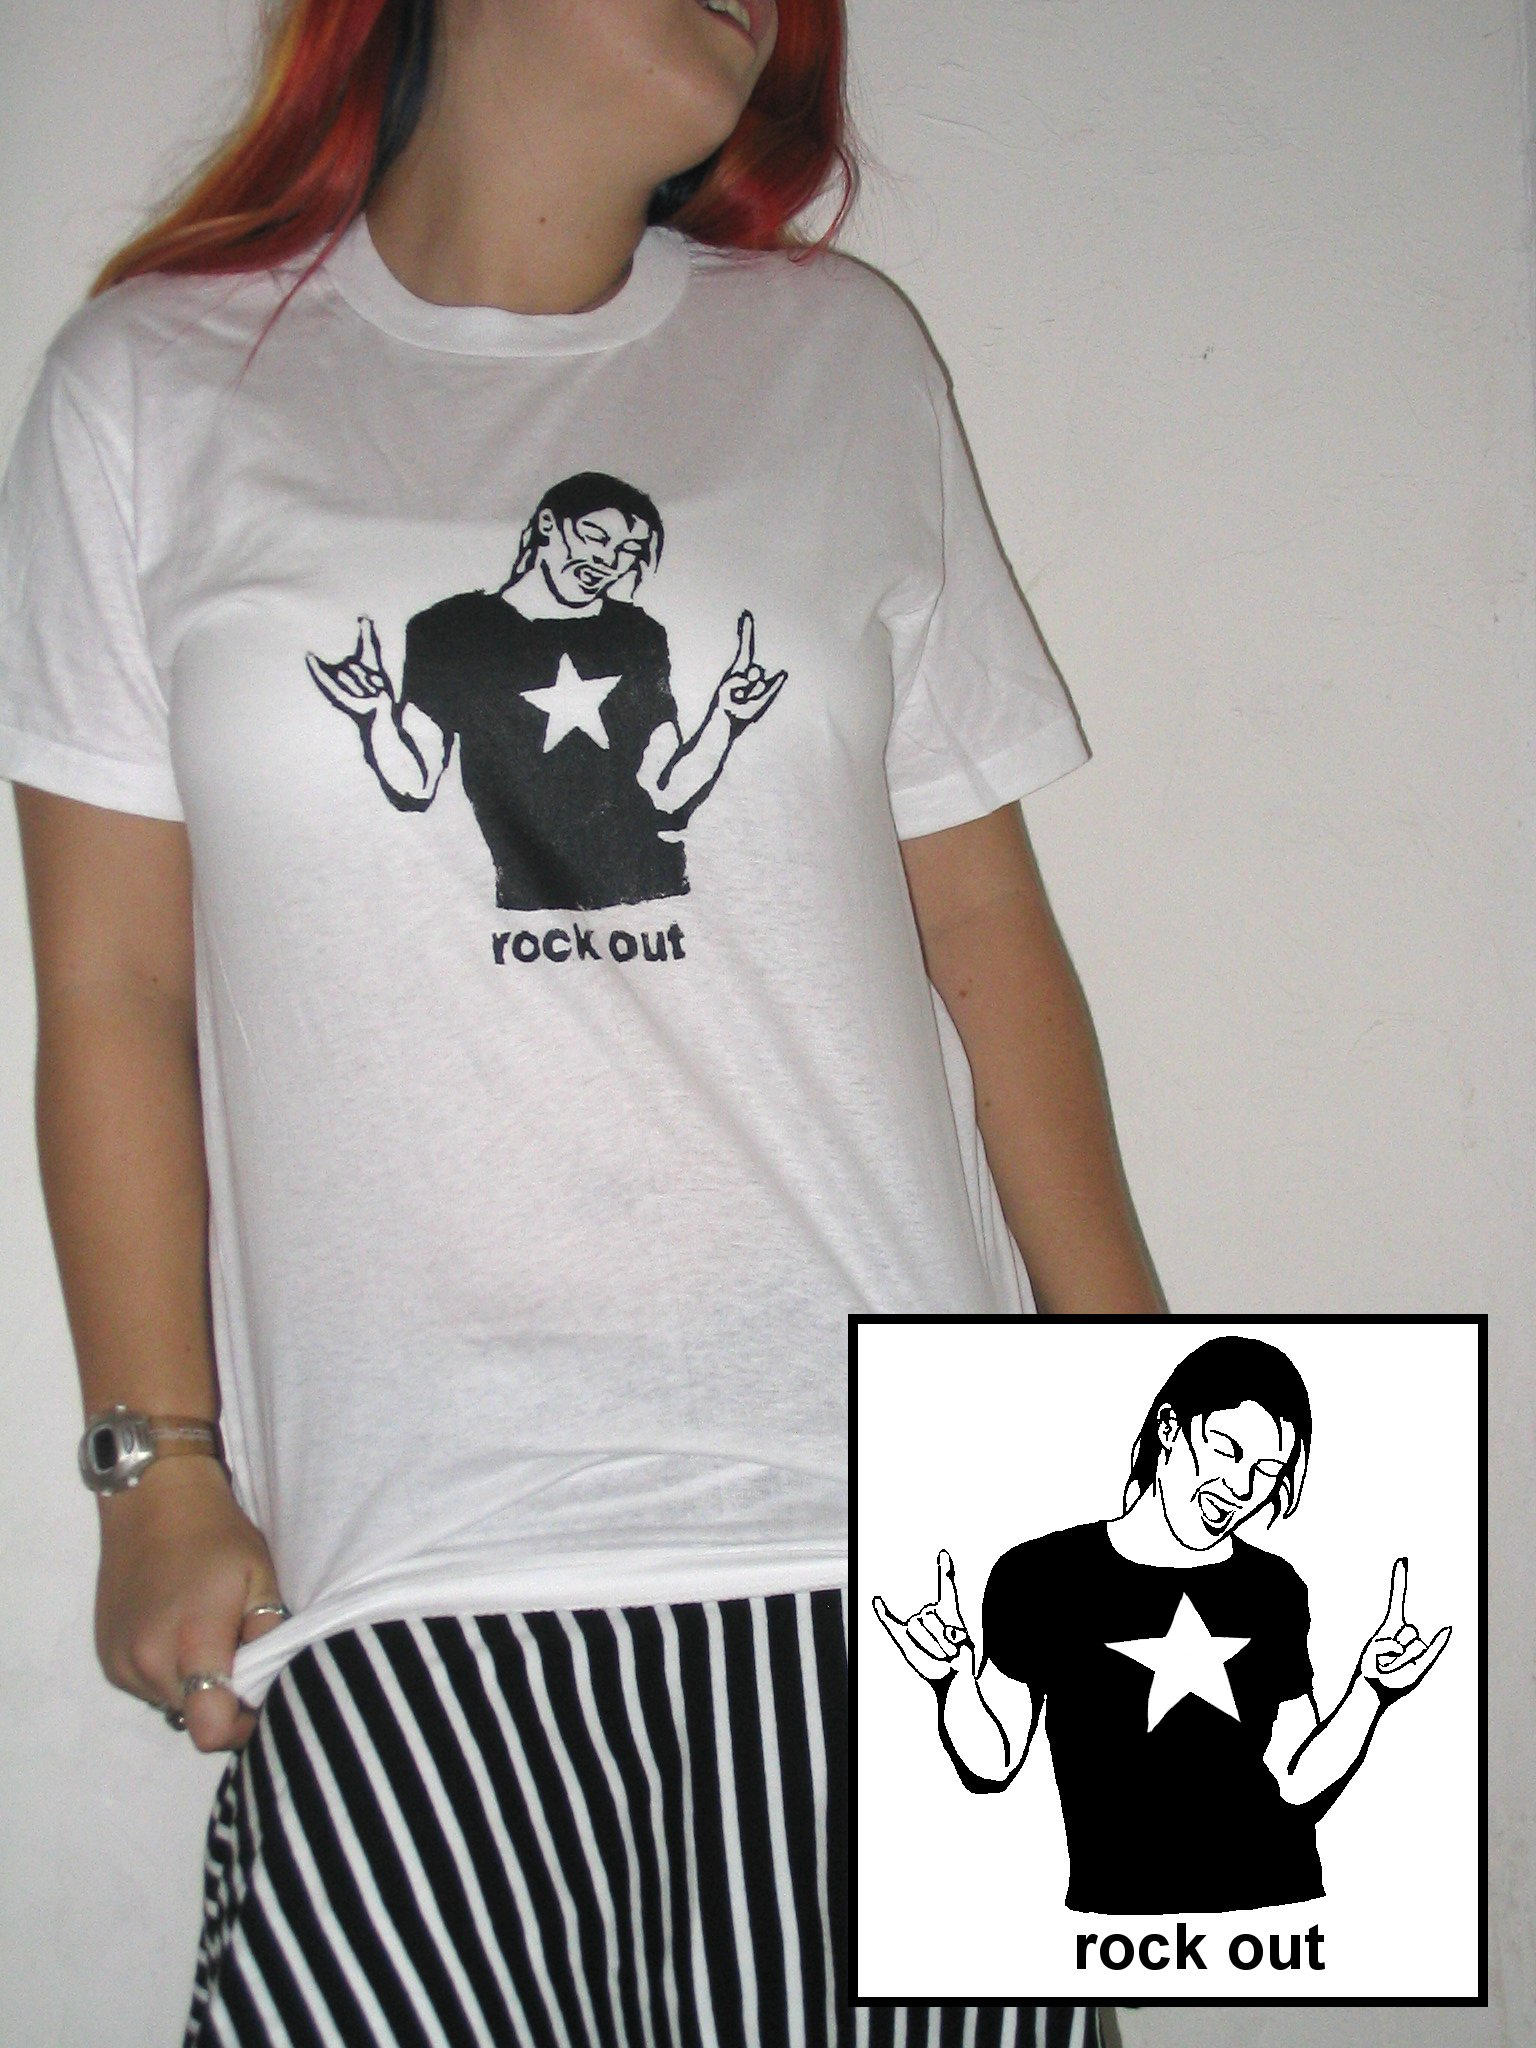
Once it's dry you should have an awesome screen printed shirt (or bag, or something else) for cheap! Here's what I did:
Here's what you need:

1) Embroidery hoop. For more stability you can use a canvas frame and a staple gun.
2) Sheer fabric. Tulle and Nylon don't work very well but you want something that you're going to be able to see through and paint will soak through.
3) Mod Podge
4) Fabric paint (whatever color you want)
5) Paint brushes
6) Scissors
7) Pencil
You'll also need a shirt or something to print on, and a pattern, drawing or design to print.

First you want to attach your fabric to your embroidery hoop or frame - make sure it is firmly secured and stretched out tight. Next you are going to trace your design onto the fabric.
After you've traced your design you are going to paint in all the NEGATIVE space with Mod Podge. This means you want to cover any area of your design that you don't want to be colored in when you print it.
Once the Mod Podge is is dry you put it down on top of whatever you want to screen print and gently dab the fabric paint (or screen-printing ink if you have it) through the screen.
Once it's dry you should have an awesome screen printed shirt (or bag, or something else) for cheap! Here's what I did:
Friday, August 1, 2008
How to Make a Mermaid Tail
Oh my god, I have such a crush on Sasha! She is super adorable, and I always love people are willing to give away their craft secrets. This tutorial is for use with a monofin, which looks really cool (I love swimming and water so I am totally facinated). Its a cool tutorial even if you don't have one though.
See her swimming around in it.
See her swimming around in it.
Saturday, July 12, 2008
How to Make Cold Porcelain
Hey everyone! Today I discovered this awesome tutorial on how to make cold porcelain. Cold porcelain isn't actually porcelain at all but is made with white glue, cold cream, glycerin, cornstarch, and water and can be used to make pendants, charms and all kinds of cute little crafts. Beware though, cold porcelain can be dissolved by heat and water - so I guess you won't be making any cups out of it.
The website ColdPorcelainDesigns.com has a lot of really cute stuff on it and a great FAQ for more information about working with cold porcelain. Check out this video tutorial from them on how to make tiny cold porcelain roses. I'm off to go make some of this myself!
The website ColdPorcelainDesigns.com has a lot of really cute stuff on it and a great FAQ for more information about working with cold porcelain. Check out this video tutorial from them on how to make tiny cold porcelain roses. I'm off to go make some of this myself!
Saturday, July 5, 2008
10 Ways to Recycle your old Books
Hey everyone! I just found this awesome post on StudentHacks.org and wanted to share it with you. At least 7 of the ten things on this list have tutorials linked to them. I have always been a fan of the book-to-book-shelf tutorial (number 3 on the list)
Check it out!
Check it out!
Tuesday, July 1, 2008
Softie Owl Tutorial
I love these little felt plushies. They are really easy to make and really cute.
Thanks to Floresita for this easy tutorial!
Also, FutureGirl has a great tutorial on her site about how to sew felt using both a whip stitch and a blanket stitch. And for more ideas you could always take a peek at Softies Central. Check it out!
Thanks to Floresita for this easy tutorial!
Also, FutureGirl has a great tutorial on her site about how to sew felt using both a whip stitch and a blanket stitch. And for more ideas you could always take a peek at Softies Central. Check it out!
Sunday, June 29, 2008
Wire Wrap Ring Tutorial
Hey guys,
My camera has no batteries (booo) so I haven't made any new tutorials. But soon! In the mean time, enjoy this awesome tutorial by Prismera. I love her voice! She sounds so cute!
My camera has no batteries (booo) so I haven't made any new tutorials. But soon! In the mean time, enjoy this awesome tutorial by Prismera. I love her voice! She sounds so cute!
Tuesday, May 13, 2008
Here's Some Crafts!
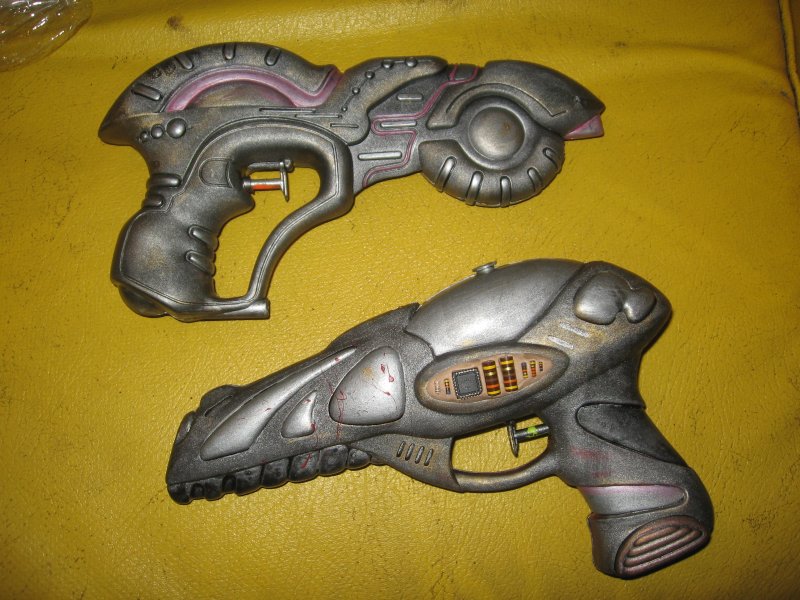
I haven't been posting any tutorials recently because I've been finishing my thesis so I can get my BA. But, I should be done with my undergraduate education by the end of this week and I can start playing on the internet and crafting full time! Until then, enjoy these squirt guns I've modded! (There is a tutorial for this below!)
This one is on sale @ ebay right now.

This one I just finished and will probably be going on sale soon:

This one is on sale @ ebay right now.
This one I just finished and will probably be going on sale soon:
Monday, January 21, 2008
How to make Adorable Cupcake Earrings
Hey everyone, I hope you enjoy this video tutorial on how to make these super cute cupcake earrings.
 For supplies you will need some sculpey (or other polymer clay). I use white sculpey and then paint it when I'm done, but you could use colored sculpey if you wanted. You will also need earring findings, and some superglue.
After baking your earrings put a little bit of superglue on the finding to keep it stuck in. If you paint your earrings remember to also seal them somehow to keep the paint from chipping.
I would love to see photos of things people make following my tutorials!
Tuesday, January 15, 2008
How To Turn a Squirt Gun into a Cool Prop
Project Level: 2 (requires minimal painting skills)
This is a fun project that only takes an hour or two (mostly paint drying time). It is pretty inexpensive. You need a plastic toy squirt gun and these supplies:
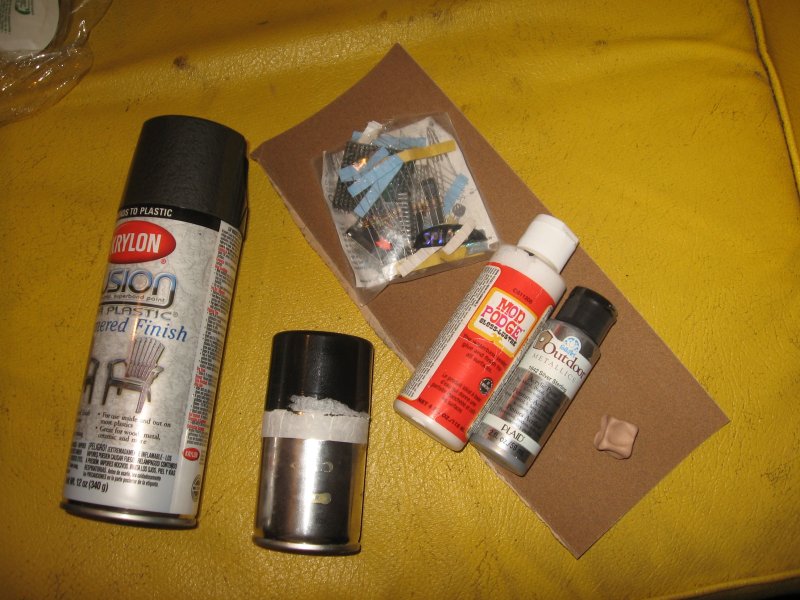
Supplies: squirt gun, sand paper, silver acrylic paint, black spray enamel, clear gloss, Krylon Fusion hammered finish.
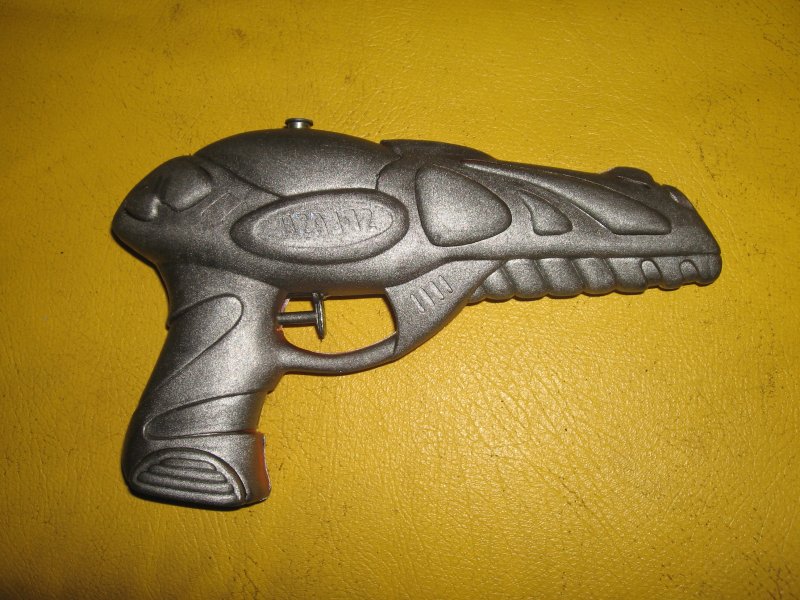
The first step is to sand any imperfections off your squirt gun (we sanded the "made in china" off of ours). The sanding will also give your paint a better surface to stick to. The Krylon Fusion paint was special for plastic and so we didn't actually need to sand the guns.

Then you spray paint the gun with a base coat of the Krylon spray paint. Try to spray evenly in big strokes to prevent the build up of spray paint.
After the first coat of paint is dry you can start adding details with the other paint colors.
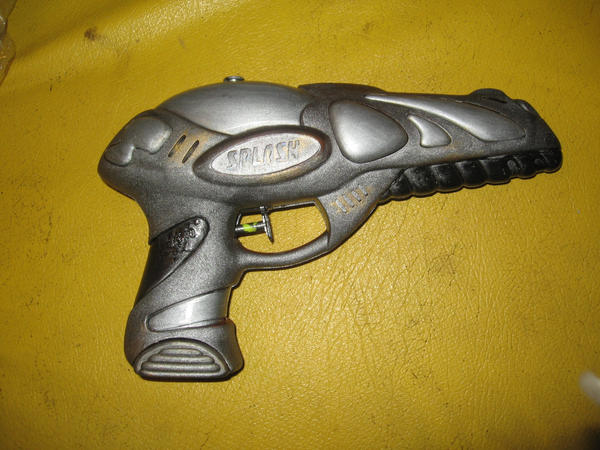
I added some resistors and microchips using some sculpey to hide the "splash" logo on mine, and also added blood spatters. Try brushing around the edges and handle of the gun lightly with a copper or gold color to make it look worn.

Yay, awesome guns!
This is a fun project that only takes an hour or two (mostly paint drying time). It is pretty inexpensive. You need a plastic toy squirt gun and these supplies:
Supplies: squirt gun, sand paper, silver acrylic paint, black spray enamel, clear gloss, Krylon Fusion hammered finish.
The first step is to sand any imperfections off your squirt gun (we sanded the "made in china" off of ours). The sanding will also give your paint a better surface to stick to. The Krylon Fusion paint was special for plastic and so we didn't actually need to sand the guns.
Then you spray paint the gun with a base coat of the Krylon spray paint. Try to spray evenly in big strokes to prevent the build up of spray paint.
After the first coat of paint is dry you can start adding details with the other paint colors.
I added some resistors and microchips using some sculpey to hide the "splash" logo on mine, and also added blood spatters. Try brushing around the edges and handle of the gun lightly with a copper or gold color to make it look worn.
Yay, awesome guns!
Monday, January 14, 2008
How To Make and Wear Wrap Pants
Project Level: n00b - if you have a sewing machine you can do this.
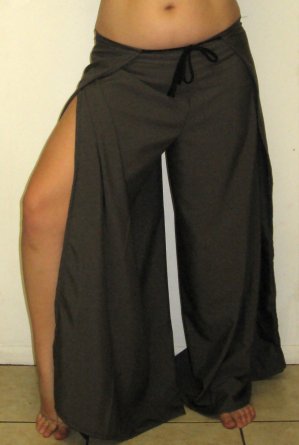
All my friends call these "comfy pants" because they are so comfortable. They are really easy to make (it takes about twenty minutes if you are using fabric that needs to be hemmed). You can use almost any kind of fabric you like, I prefer cotton but I've made them out of denim, synthetic-blends, strechy fabric, all kinds of fabrics.
Here are the basic instructions:
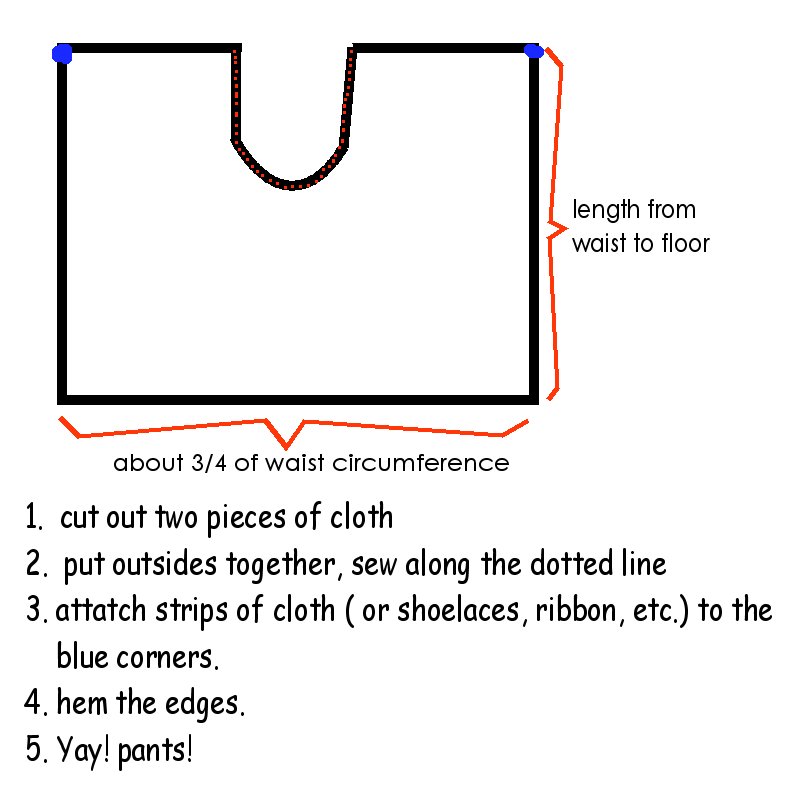
The hole that you cut out is for the crotch of the pants and should be about as big as your head. If you get it wrong and its too small, you can always cut more out and resew that seem. All the measurements are very forgiving.
Here's how to put this pair of pants on:
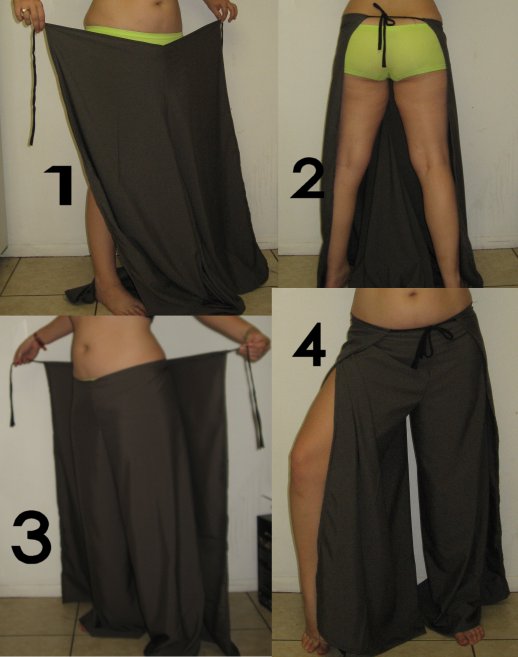
1. Grab an edge that has two of the ties, the seam should be in the middle
2. Wrap that edge around your waist and tie in the back.
3. Pull the rest of the fabric between your legs and up behind you. Grab the other edge with ties.
4. Wrap that side around and tie in front. yay!
If you didn't follow that maybe these instructions will help:

Enjoy your wrap pants!
All my friends call these "comfy pants" because they are so comfortable. They are really easy to make (it takes about twenty minutes if you are using fabric that needs to be hemmed). You can use almost any kind of fabric you like, I prefer cotton but I've made them out of denim, synthetic-blends, strechy fabric, all kinds of fabrics.
Here are the basic instructions:
The hole that you cut out is for the crotch of the pants and should be about as big as your head. If you get it wrong and its too small, you can always cut more out and resew that seem. All the measurements are very forgiving.
Here's how to put this pair of pants on:
1. Grab an edge that has two of the ties, the seam should be in the middle
2. Wrap that edge around your waist and tie in the back.
3. Pull the rest of the fabric between your legs and up behind you. Grab the other edge with ties.
4. Wrap that side around and tie in front. yay!
If you didn't follow that maybe these instructions will help:
Enjoy your wrap pants!
Subscribe to:
Posts (Atom)